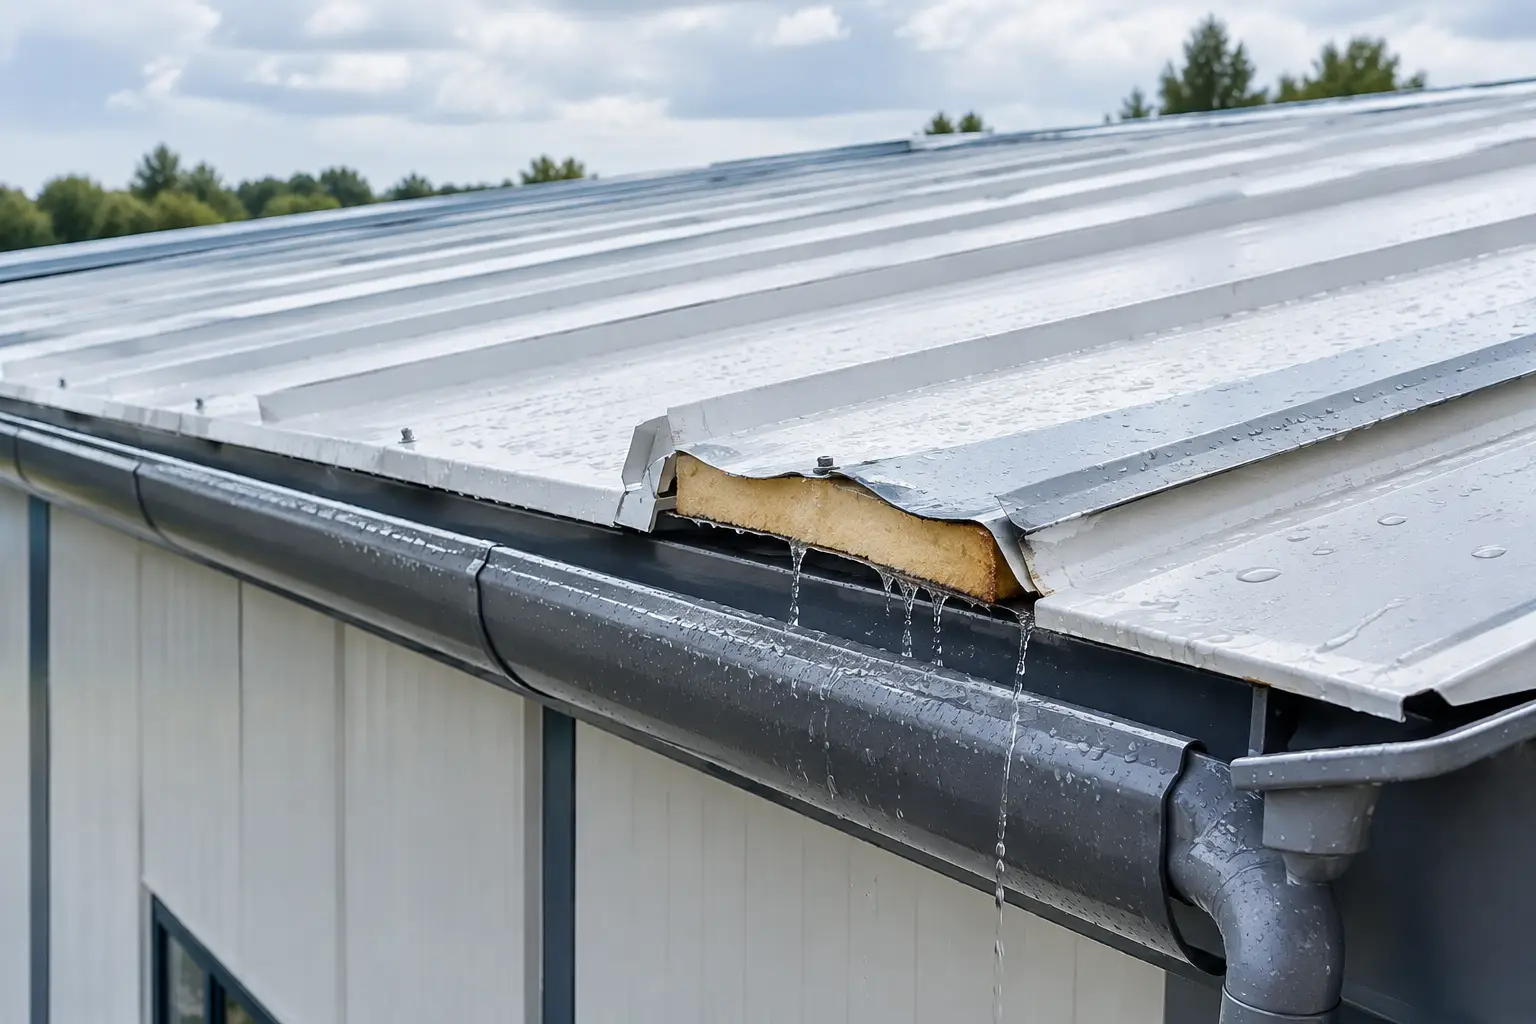
A roof can look sound from ground level yet admit water during the first heavy rain. When contractors or facility owners ask, why do panels leak water, the panel itself is not always the cause. In most cases, water enters at a joint, penetration, flashing detail, fastener, or drainage point where the roofing system was installed, altered, or maintained incorrectly.
For warehouses, factories, prefab buildings, cold stores, and commercial structures, a small leak should be investigated early. Water can wet insulation, stain internal finishes, affect stored goods, and eventually corrode supporting components. Finding the actual entry point requires a methodical inspection, because water often travels beneath a panel overlap or along a purlin before it becomes visible indoors.
Why Do Panels Leak Water at Joints and Overlaps?
Roofing and insulated sandwich panels rely on correctly formed side laps and end laps to direct rainwater toward the gutter. If the overlap is too short, installed against the roof slope, unevenly compressed, or missing the required sealing material, water can be driven beneath it by wind and rain.
This is particularly relevant on low-slope roofs. A roof with limited pitch drains more slowly, so water remains near panel joints for longer. A detail that performs adequately on a steeper roof may be less forgiving when drainage is slow. Panel profile, roof slope, lap direction, panel length, and local weather exposure should all be considered during design and installation.
End laps deserve close attention. They must be supported, aligned, sealed, and fixed according to the panel system requirements. A gap beneath an end lap, or a sealant line that has been interrupted, can create a direct path for water. In many leak investigations, the visible stain is below the lap, but the underlying problem begins higher up the roof.
Fasteners Can Create Small but Serious Leak Paths
Every roof fastener penetrates the outer metal sheet. The washer beneath its head is designed to seal that penetration when the fastener is installed correctly. Problems arise when fasteners are over-tightened, under-tightened, installed at an angle, or placed outside the recommended fixing line.
An over-tightened fastener can distort the washer and reduce its sealing contact. An under-tightened fastener may leave a small opening that allows water to enter. A crooked fastener can create an uneven seal even when it appears tight from a distance. Missing fasteners may also allow panel movement, which can gradually open laps and flashing connections.
Fasteners should not be tightened repeatedly without inspection. If a washer is damaged, aged, or no longer sealing properly, replacing the fastener with a suitable compatible fixing is usually more reliable than trying to force it tighter. The replacement should match the roof build-up and fixing requirement, including the correct length for the panel and support structure.
Flashings Are Often the Weak Point
Flashings close and protect the vulnerable edges of a roof. Ridge caps, eave flashings, verge flashings, wall flashings, and penetration flashings must work with the panel profile rather than simply cover it. If they are poorly shaped, loosely fixed, or inadequately sealed, wind-driven rain can enter behind them.
Ridge areas are a frequent concern because they join two roof slopes. A ridge cap needs proper overlap, closure treatment where required, and secure fastening. At roof-to-wall connections, water can enter where the panel meets masonry, cladding, or another roof surface. The flashing must direct water outward, not create a channel behind the panel.
Penetrations need the same attention. Pipes, ducts, cable routes, rooflights, exhausts, and equipment supports interrupt the normal drainage path. Cutting a panel opening without a correctly designed curb or flashing detail can create a persistent leak point. Applying excess sealant over an unsuitable detail may hide the issue temporarily but does not correct the water path.
Drainage Problems Can Make Sound Panels Leak
Water should leave the roof quickly through the eaves, gutters, downpipes, and drainage outlets. When gutters are blocked by dust, leaves, construction debris, or loose sealant, water can back up at the eave. Under heavy rainfall, it may rise above the intended drainage line and enter panel ends or adjacent flashing joints.
Gutter capacity also matters. A gutter that is too small for the roof area or poorly pitched can overflow during intense rain. Sagging gutters and incorrectly positioned downpipes can create standing water, staining, and repeated wetting around roof edges.
In the UAE, roofs can accumulate dust and site debris between rainfall events. The next rain may wash this material into outlets and downpipes, making routine cleaning a practical part of leak prevention. Drainage maintenance is not separate from roof maintenance. It protects the joints and edges that must remain dry.
Panel Damage and Site Alterations Need Investigation
Impact damage, foot traffic, dropped tools, and unplanned service work can affect roofing panels. A dent does not always cause leakage, but damage near a lap, fastener, flashing, or panel rib deserves inspection. Scratches that expose the metallic coating should also be assessed, particularly where moisture can remain trapped.
Later modifications are another common source of problems. A contractor may install a new pipe, conduit, solar support, sign, or mechanical equipment after the original roof has been completed. If the work bypasses the panel system's proper fixing and flashing approach, it can compromise weather resistance. The roof should be treated as an integrated system, not as a surface that can be cut or drilled without detail coordination.
Thermal movement can also affect connections over time. Metal roofing expands and contracts as temperatures change. Systems need correctly spaced fixings, allowance for movement where applicable, and compatible accessories. Rigid repairs across moving joints may crack or pull away, especially where sealant has been used as the only line of defense.
How to Trace a Panel Roof Leak
The first visible drip is rarely the best place to begin. Start above the internal water mark and follow the roof slope upward. Look for staining on the underside of panels, wet insulation, rust marks around fasteners, open laps, damaged sealant, and gaps at flashings.
A useful inspection should review the full drainage route, not just one panel. Check whether gutters are clear, downpipes are flowing, and water is collecting near the eaves. Inspect ridge caps, roof-to-wall connections, panel end laps, and penetrations. If the leak occurs only during wind-driven rain, pay particular attention to side laps and exposed edges.
Do not rely on a hose test without a plan. Flooding a roof area can send water into locations that would not normally receive that volume of water, producing misleading results. Controlled testing by an experienced roofing professional can be useful when visual inspection does not identify the entry point.
For safety, avoid walking directly on roof panels unless the roof system, access method, and support locations have been confirmed. Improper foot traffic can damage panel faces, distort laps, and create another leak while investigating the first one.
Repair the Cause, Not Only the Stain
Effective repairs depend on the fault found. A failed fastener may need replacement. An open lap may require cleaning, correct sealing, refastening, or localized panel adjustment. A damaged flashing may need to be reformed or replaced. A blocked gutter needs cleaning and a check of its fall, outlets, and condition.
Before applying sealant, the surface must be clean, dry, and suitable for the selected product. Sealant applied over dust, loose coatings, old failed material, or standing moisture may not adhere as intended. Compatibility also matters. The sealant, fasteners, flashings, and panel coating should be selected for the specific roofing application.
Where water has entered insulated sandwich panels, inspect the affected area carefully. Wet insulation can reduce thermal performance and may require more than an external patch. The required scope depends on how long the leak has been present, the panel construction, and whether water has reached internal finishes or structural components.
Preventing Future Water Leaks in Panels
A panel roof performs best when its materials and accessories are planned as one system. Correct panel selection, suitable roof slope, properly designed drainage, compatible flashings, and accurate installation all contribute to long-term weather protection. Procurement decisions should include the accessories that complete the roof, not only the panel sheets.
After handover, schedule inspections before and after periods of heavy weather, and after any roof-mounted work. Look for loose fasteners, cracked sealant, damaged flashings, blocked outlets, and debris in gutters. Early maintenance is generally simpler than tracing a leak after insulation and interior materials have become wet.
For new builds and repair projects, MetalSpan Trading can help contractors and project teams source roofing panels, flashings, gutters, ridge caps, and compatible accessories suited to the project requirement. A careful assessment before materials are ordered can prevent avoidable site changes later.
A leaking panel roof is a signal to examine the full water-management detail. Address the joint, fixing, flashing, or drainage condition that allowed water in, and the repair has a far better chance of lasting through the next storm.