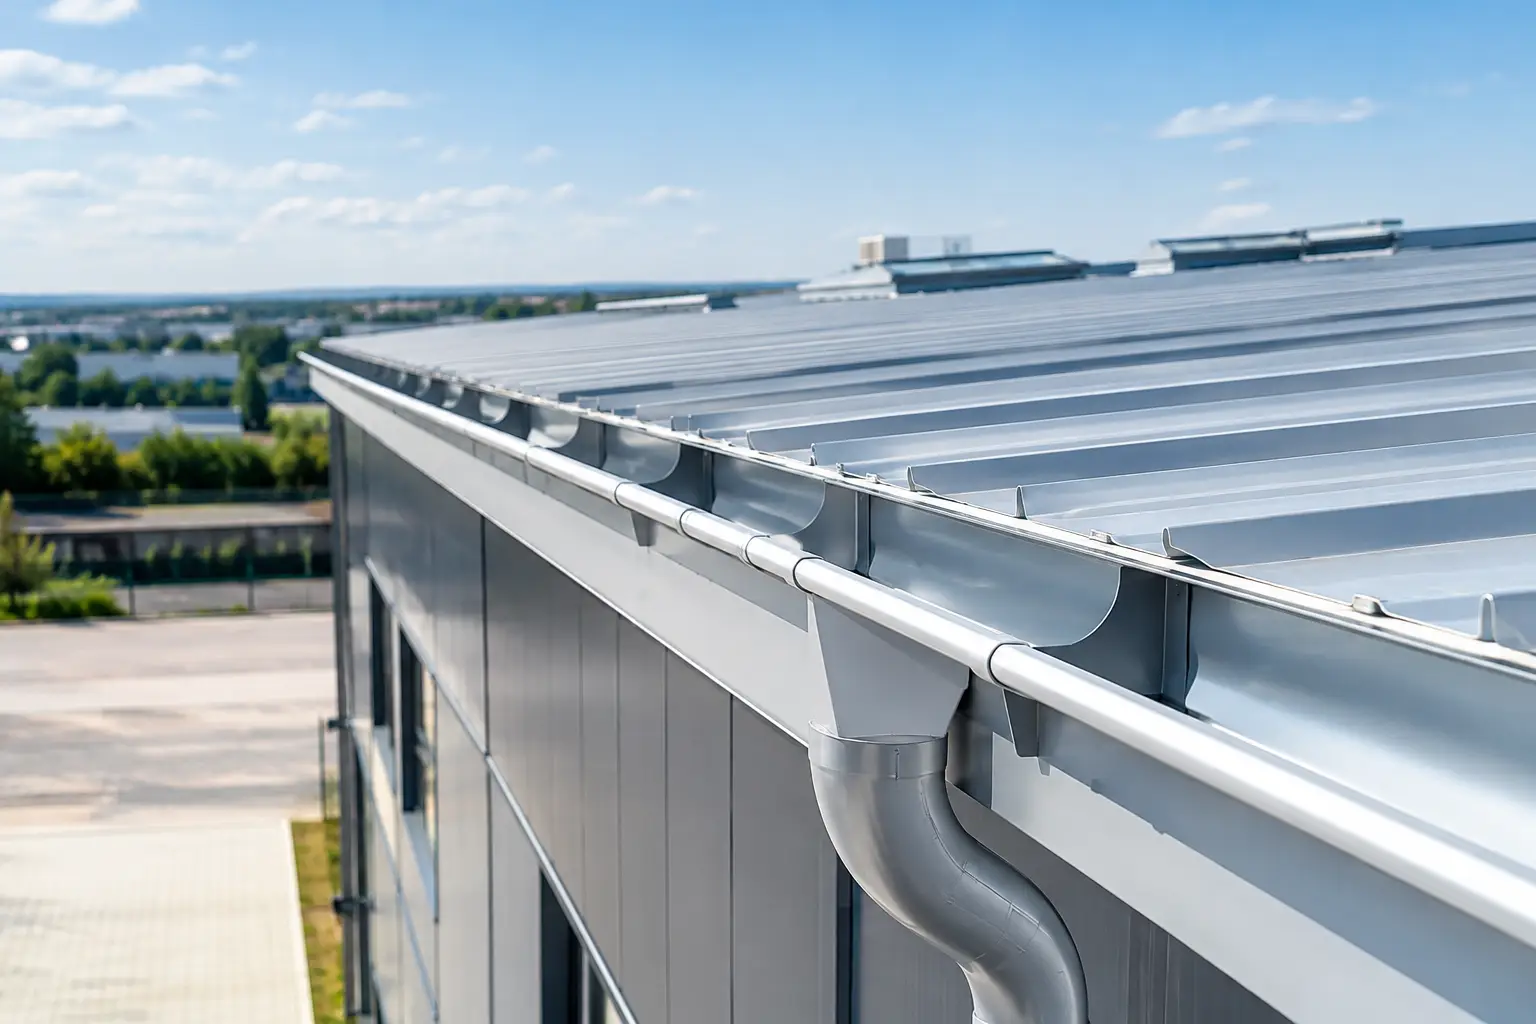
A gutter that appears wide enough can still overflow when heavy rain reaches a large roof area, a valley concentrates runoff, or too few downspouts are installed. This gutter sizing guide helps contractors, project managers, and building owners assess drainage requirements before ordering gutters, flashings, and roofing accessories for commercial or industrial work.
Correct sizing is not just a detail at the roof edge. It protects wall cladding, entrances, foundations, loading areas, and the roof assembly itself from uncontrolled water discharge. For warehouses, factories, prefab buildings, and other low-slope or pitched-roof structures, the gutter system should be planned alongside the roofing profile, roof geometry, and drainage layout.
Gutter Sizing Guide: Start With Roof Drainage Area
The first sizing input is the roof area draining to each gutter run. Do not use the total building footprint automatically. Divide the roof into separate drainage zones based on ridges, slopes, valleys, parapets, and expansion joints. Each gutter must carry only the water directed toward it, but every section of that run must be checked for the volume it receives.
For a simple gable roof, each eave gutter normally receives runoff from one roof slope. A complex roof requires more care. A valley can send water from two roof planes into a short section of gutter, creating a concentrated flow that is far greater than the flow at a typical eave. This is one of the most common reasons a system that looks properly sized on paper performs poorly during intense rain.
The relevant figure is often called the effective drainage area. It reflects the horizontal roof area contributing to the gutter and, depending on the design method and local requirements, the roof pitch and configuration. Steeper roofs shed water more quickly, while low-slope roofs may direct flow toward internal drains, scuppers, or perimeter gutters. The roof plan should make the drainage path clear before gutters are selected.
Account for Rainfall Intensity, Not Average Rainfall
Gutter capacity must be based on design rainfall intensity for the project location, not annual rainfall averages. A location with limited annual rainfall can still experience short, high-intensity storms that place substantial demand on a roof drainage system.
For projects in the UAE, the applicable local authority requirements, building design criteria, and the engineer's drainage calculations should guide the final selection. Rainfall assumptions can vary by location, project type, and approval requirement. Using a generic figure from another region can lead to an undersized system or unnecessary material cost.
A drainage designer typically relates rainfall intensity to the effective roof area to estimate runoff. In simple terms, more roof area and more intense rainfall require more drainage capacity. The gutter, downspouts, outlets, and discharge route must all handle that capacity. Increasing gutter width alone will not solve a restriction created by undersized outlets or downspouts.
Choose a Gutter Profile That Suits the Roof
Commercial and industrial roofs commonly use box-style gutters or formed eave gutters because they integrate well with metal roofing and flashing details. The best profile depends on the roof sheet, eave condition, required capacity, support arrangement, and the way the system connects to downspouts.
A deeper gutter can carry more water than a shallow one of similar width, but depth also affects installation clearance, bracket design, and the relationship between the gutter and roof edge. A wider gutter offers more capacity, yet it may require additional support and carefully designed end caps, outlets, and joints. The selected shape should be practical to fabricate, install, inspect, and maintain.
Material selection matters as well. Galvanized and pre-painted steel options are widely used in metal building applications when the coating system and thickness are appropriate for the project environment. The gutter material should be compatible with the roofing sheets, flashings, fasteners, and sealants used around it. Mismatched materials or poorly detailed joints can create corrosion risks and premature leakage.
A supplier can help confirm available dimensions and compatible accessories, but final drainage capacity should remain aligned with approved project drawings and engineering requirements.
Downspouts Often Control the System Capacity
A gutter is only a temporary channel. Water must leave it quickly through correctly sized and correctly located outlets and downspouts. If the downspouts cannot drain the gutter at the required rate, water can back up and overflow at the lowest edge or near a concentrated inlet.
Downspout spacing should reflect the roof drainage area, gutter slope, outlet size, and points where water enters the gutter. Long gutter runs often need multiple outlets. Placing all drainage at one end may be possible for a small, simple roof, but it increases the flow carried by the gutter as water moves toward that outlet. On larger roofs, distributing outlets can reduce loading on individual sections and provide a more manageable drainage layout.
Pay special attention to valley outlets. Where a valley terminates above a gutter, the water enters at speed and in a concentrated stream. This area may need a larger outlet, a deeper local gutter section, a splash control detail, or a redesigned valley arrangement. The answer depends on the roof geometry and calculated runoff, not on a standard detail used without review.
The downspout discharge must also have a clear path away from the building. Discharging directly onto walkways, door thresholds, or lower roof surfaces can transfer the problem rather than solve it. Coordinate the final discharge with site drainage, paved areas, underground drainage connections, and building access routes.
Set the Right Gutter Slope and Support Details
Even a correctly sized gutter can hold standing water if it is not installed to the intended fall. A controlled slope toward outlets supports drainage and reduces sediment buildup. The exact slope should follow the project design and the gutter profile, but the installation team should be able to verify it with levels and clear reference points before final fixing.
Support spacing is equally important. Gutters carrying rainwater, wind loads, and occasional debris need brackets or supports appropriate for the material gauge, profile depth, and span. Insufficient support can cause sagging, which creates low points where water collects. Those low points can accelerate coating wear, strain joints, and reduce the useful drainage capacity of the system.
Expansion and movement need consideration on long runs. Metal gutters change dimension with temperature variation. Well-planned joint locations, laps, sealants, and expansion provisions help prevent cracking, distortion, or leaks at connections. These details should be coordinated with the roof sheet layout and flashing sequence rather than added after roofing work is complete.
Check the Details That Cause Overflow
Many drainage failures are caused by local installation details rather than an incorrect gutter size. Before procurement and installation, review the roof edge, valley terminations, gutter outlets, overflow provisions, and downspout connections as one system.
Four checks are particularly useful on commercial projects:
- Confirm that roof sheets and eave flashings direct water into the gutter without bypassing its back edge or front lip.
- Check valley ends and roof transitions for concentrated flow that may exceed the capacity of a standard gutter section.
- Verify outlet positions, sizes, and downspout routes against the approved drainage plan.
- Allow safe access for cleaning leaves, dust, construction debris, and sediment from gutters and outlets.
Overflow paths deserve attention too. During unusual storm conditions or a blocked outlet, water should not be forced back into roof insulation, wall cladding joints, or occupied areas. The appropriate overflow approach depends on the roof configuration and applicable project requirements, so it should be identified during design coordination.
Plan Procurement Around the Complete System
Ordering gutters by length alone can leave a project short of essential components. A complete request should identify the gutter profile, developed width, material and finish, thickness where specified, lengths, outlet locations, end caps, brackets, downspouts, elbows, connectors, sealants, and matching flashings. Providing roof drawings or a gutter layout reduces ambiguity and helps the supplier prepare a quotation that reflects the actual installation scope.
For projects using profiled roofing sheets or insulated sandwich panels, gutter and flashing details should be coordinated early. The roof system, insulation thickness, purlin arrangement, eave closure, and wall cladding interface can all affect the final gutter position. Early coordination also helps prevent site modifications that slow installation or compromise appearance.
MetalSpan supports UAE construction projects with roofing accessories, gutters, flashings, and related steel building materials selected around project-specific requirements. Clear drawings, quantities, and technical expectations allow the supply process to remain efficient and reliable.
A well-sized gutter is a small part of the building envelope, but it carries a large responsibility. Treat it as a coordinated drainage system from roof catchment to final discharge, and the right material and profile choices become much easier to make.